Starting jCarto
|
First, fire up jCarto. This should be trivial if you have a Java2 platform
installed. On UNIX or Linux, simply run the jCarto script. On other platforms,
simply issue the command:
java -Xmx80m -Xms32m tempusmud.carto.jCarto
Note that the jCarto directory must be in your CLASSPATH. If you need to
download Java, get it from java.sun.com
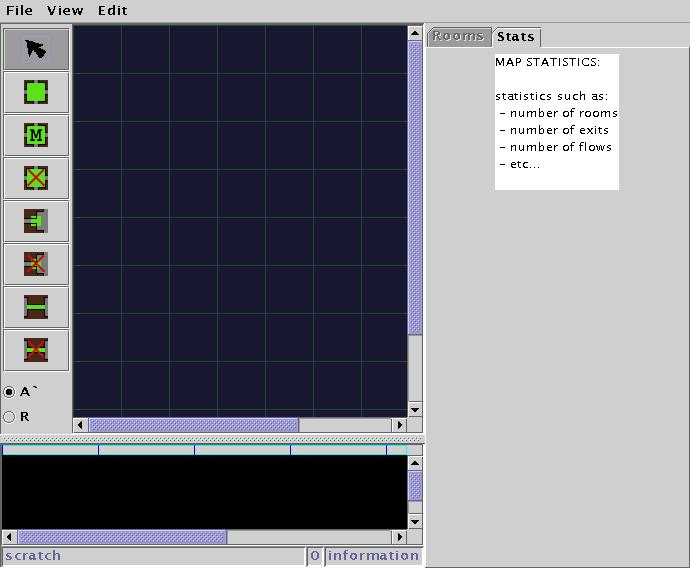
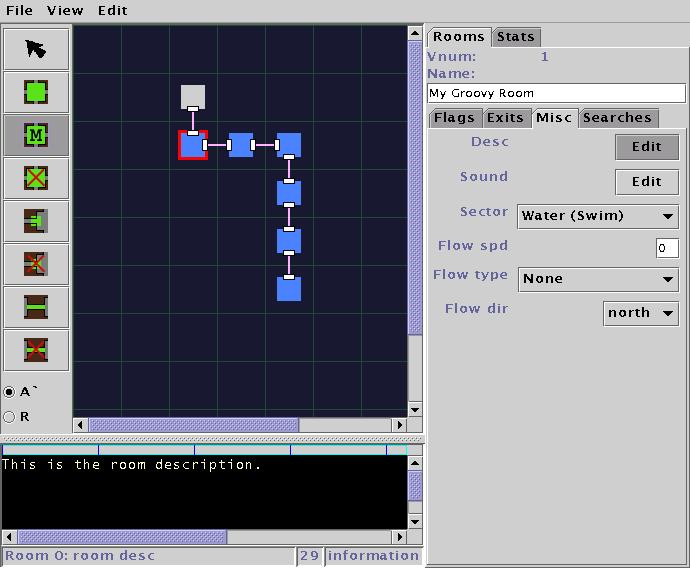
You should then be presented with a interface that looks like this:
Important regions of the interface are:
- The menubar, at the top.
- The Toolbox, at the left.
- The text editor, at the bottom.
- The Editing panel, at the right.
- The map grid, in the center.
|
|
Toolbox icons:
|
|
To the right you see a legend which describes the functions associated
with the various toolbox icons.
|
| Icon |
Function |

|
Select/move.
|

|
Create a room.
|

|
Mimic the selected room.
|

|
Destroy a room.
|

|
Create an exit, attached to a room, without a link.
|

|
Destroy an exit and any associated links.
|

|
Create a link between 2 rooms.
|

|
Destroy a link without destroying its endpoint exits.
|
|
Creating a Room |
|
First, we want to create a room. Click on the 'Create Room' button in
the toolbox to go into Create Room mode. Then click anywhere on the
map grid to place your new room.
|

|
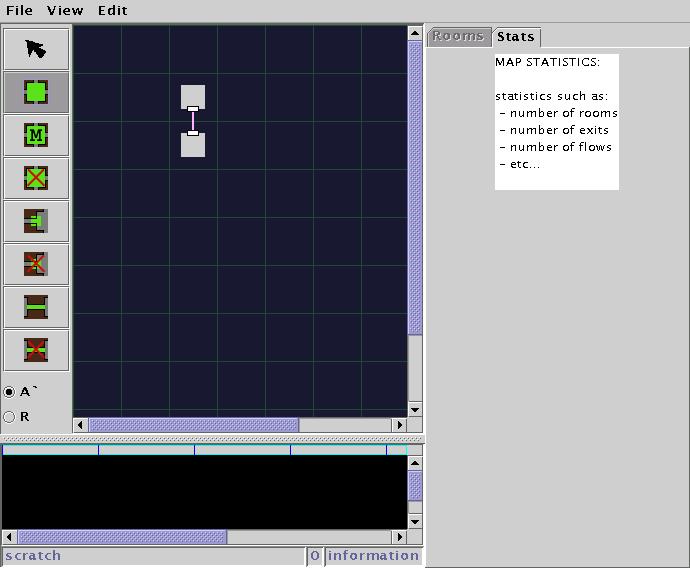
Create an automatically linked Room |
|
Now, we want to create another room. Click in the grid square just
below the first room. Note that a link between the two rooms is automatically
created. The pink line represents the link. The small white rectangles
represent the actual Exit on the room. You can have exits without links,
but not links without exits. Exits without links are mainly useful for
directional text descriptions.
|
|
Editing a Room |
|
Next, click on the Selection button on the toolbox to put you in Select mode.
Now click on the bottom room. It becomes outlined in red when it is selected.
The editing panel at the right now allows you to edit the room. As you can
see, you may change the room title and the roomflags. Click on the editing
Tab labelled 'Misc' to proceed.
|

|
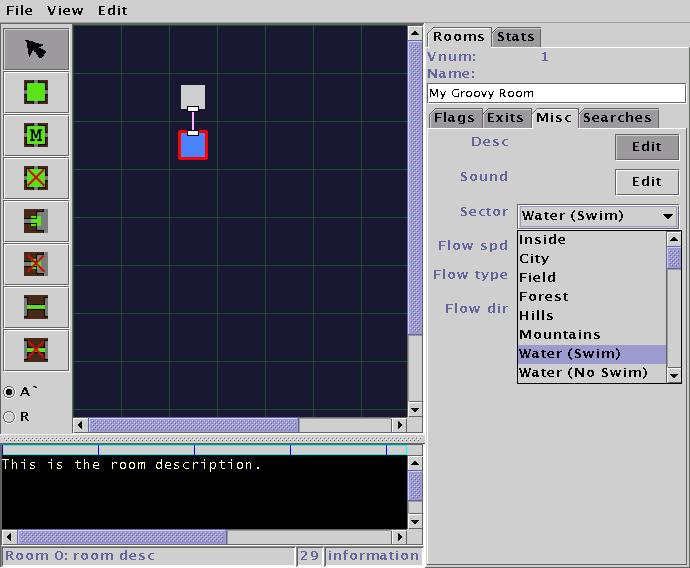
Editing a Room Description |
|
Now you may edit several more room parameters. To edit the room description,
depress the button on the Editing panel labeled 'Edit', located to the right
of the word 'Desc'. This sets the Text Editor at the bottom of the interface
editing the room description. Room sounds are edited in a similar way. Note
that the info bar at the bottom of the Text Editor informs you of what it is
currently editing.
|

|
Setting the Room Sector Type |
|
Now use the drop down Sector menu to choose a sector type. In this example, I
have chosen 'Water (Swim)'. Notice that the room has changed color to reflect
the sector type.
|
|
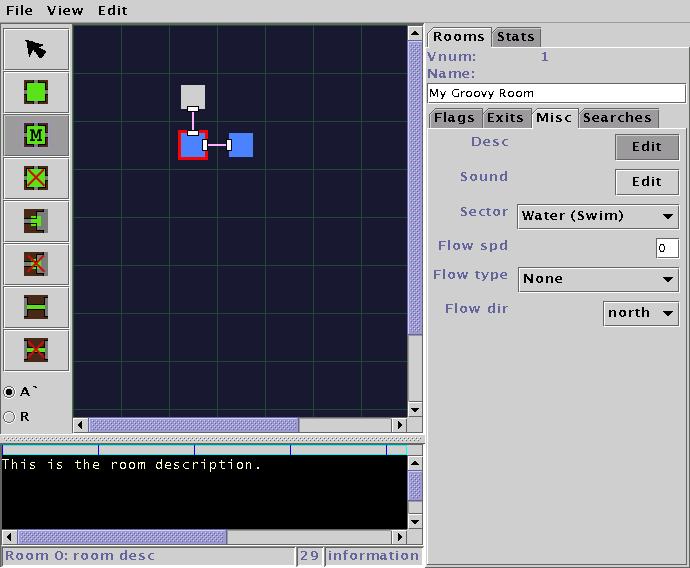
Mimicing Rooms |
|
Lets make some more rooms like our currently selected water room. Click on the
Mimic Room button in the tool box. Now click beside the water room to create
another room just like it.
|
|
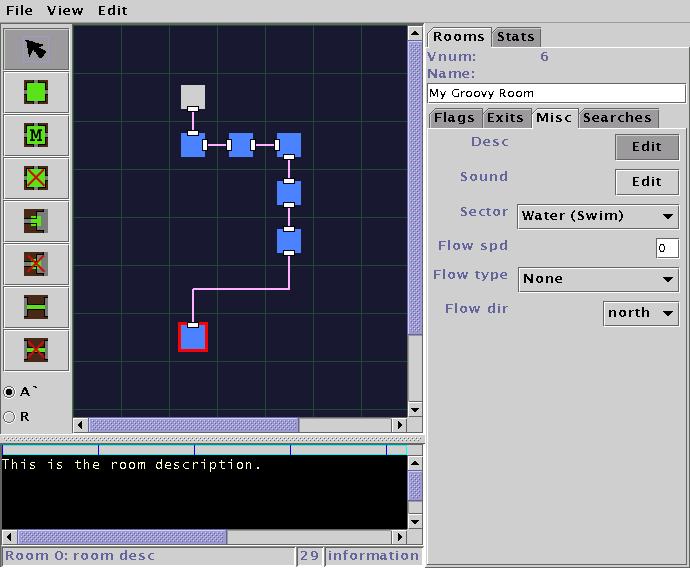
Mimicing Rooms (part 2) |
|
Make a small river by mimicing the water room several times in a row.
Note that if you click on an existing room while in Mimic mode, the existing
room will be changed to match the selected room.
|
|
Moving Rooms |
|
You may also move rooms around once they are placed. Simply click on the
Selection button in the toolbox, then press and drag any room around. Release
to stop dragging it. Note that room links are automatically re-arranged
when a room is moved. Sometimes it is impossible to move a room because
its links cannot be laid out in an acceptable manner
|
|